Thursday, March 31, 2011

KIY PROJECT# 5: MAGNETIC CHAIN NECKLACE


This is a great necklace and so so easy to make. You can really use any combination of KLIK KLIK magnets in it to customize it for your own stylish sensibilities!  If you love Fallon's jewelry like we do, chains + magnets are a really great combination.


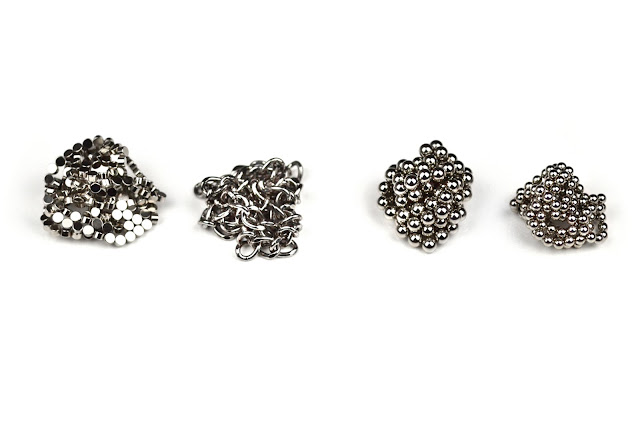
To get started you'll need KLIK KLIK small disc magnets, $35 @ klikklikjewelry.com; 
KLIK KLIK medium sphere magnets, $45 @ klikklikjewelry.com; and KLIK KLIK small sphere magnets, part of the $75 KLIK KLIK JEWELRY KIT @ klikklikjewelry.com. Additionally, you will need a chain that is a magnetic alloy. You can pick this up at Michael's Arts and Crafts like we did for about $5, or search your jewelry and see if you have something that works as well. A great tip when going to Michael's is to always bring along some KLIK KLIK magnets to test on their products. Some chains will be magnetic while others will not, so it's always good to know before you buy and bring home.


First pull out a strand of the medium sphere magnets. You'll want it to be just longer than the final length of necklace you're making... a little more than 2'. To one end of that, attach your chain. You want the chain and magnet string to be the same length, so if you're using a chain from home or one that's slightly longer use pliers to snip it, or just make a longer necklace by adding more medium sphere magnets to compensate. 


Align the chains together so they make one long magnet-chain.


Pull out an equally sized chain of small sphere magnets and repeat the last two steps, attaching at the end and aligning them with the chain and medium spheres to make a thicker magnet-chain.


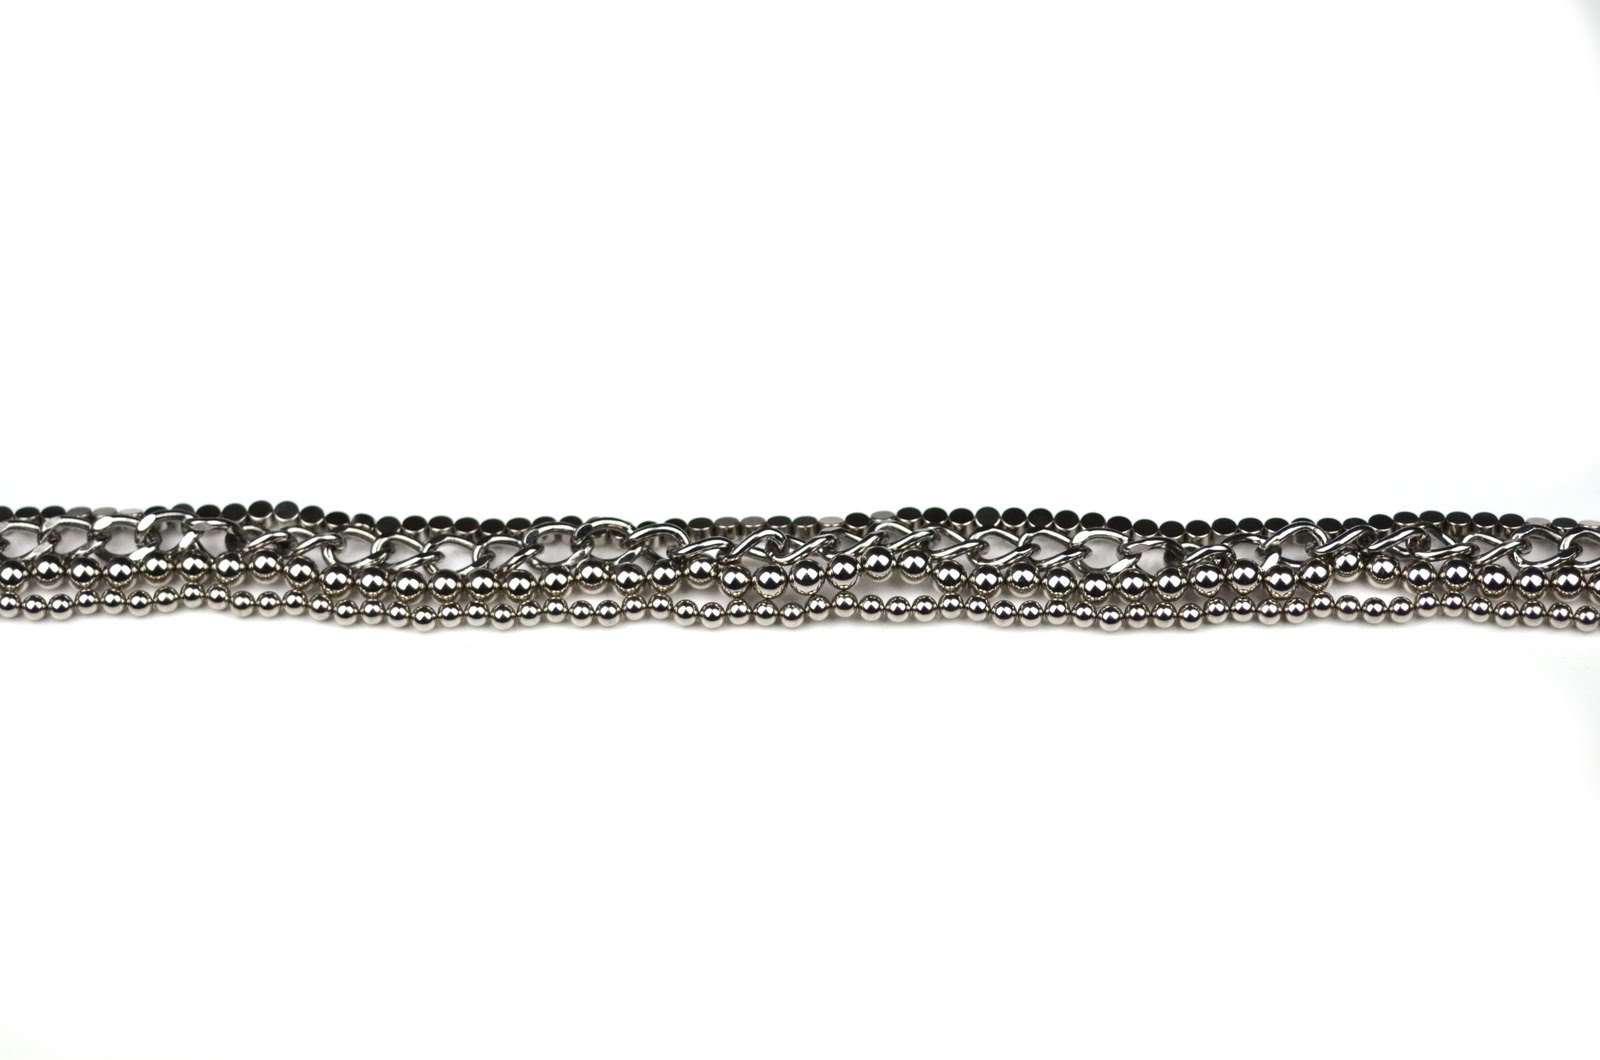
Again, do the same thing with your disc magnets so you have a flat chain of disc, medium sphere and small sphere magnets all attached to your chain.


Now comes the fun part. Grab either end of your newly made magnet-chain and twist. Keep twisting until you get a nice amount of pattern developing. If you hate twisting, you can wear it as it is, or if you are a twist lover go right on and twist til your hearts content! The great thing about his design is you can't do it wrong. 


Once you have achieved the perfect amount of twist for you, connect the two ends on the chain together and you're done! Super easy and awesome looking. You can even experiment with winding it around your wrist to make a rad cuff bracelet. We especially love this design because you can re-purpose it into so many other cool jewelry items and it looks so fabulous against a girly dress.


Monday, March 28, 2011

KIY PROJECT# 4: DINOSAUR NECKLACE/BRACELET


What's more fun than dinosaurs?! Page found some adorable little dinosaur magnets and obviously had to build a KLIK KLIK necklace for them to live in. Best part, they also make a great bracelet! So, commence the dinosaur necklace tutorial...


Start with 2 tubes of KLIK KLIK small disc magnets, 2 tubes of KLIK KLIK medium sphere magnets and your favorite dinosaur magnets. If you don't have a collection of dinosaur magnets already, or have the faintest idea where one even buys dinosaur magnets you can always make them yourself. Get some dino's from the local Toy's R Us and super glue a magnet to the back. If you hate dinosaurs (I doubt anyone hates dinosaurs though! Maybe cavemen?) then improvise with a magnet you do like. Maybe kittens or puppies or rainbows or shooting stars or daisies... the possibilities are endless.


Pull out a strand of small disc magnets and medium sphere magnets.


Twist the two strands together.


Pull out another strand each of small disc magnets and medium sphere magnets. Attach them to one end of the twisted strand...


...and casually add them to your design. Don't worry about it looking perfect, this necklace has a mashed-up look in the end.


Now add small amounts of magnets all over to fill out the bulk of the design. We're making a chunky necklace here! Get chunky-ing!


Once you have incorporated all of the magnets, mold the design into the shape you like best and connect in the back. It should hold together nicely, while still being heavy.


Finally, the fun and easy part! Take your dino magnets and stick them onto your chunky necklace. Now just pair it with a Spider Man t-shirt and you're all set to go to a 5 year old's birthday party! Or just look awesome doing everything else.


And if the occasion calls for a bracelet instead... just pull apart your necklace and make one! Dino-chic for sure.


Sunday, March 27, 2011

STILL... The Best Manicure. Ever.


Just in case you didn't believe me about the miracle manicures out here in Brooklyn, take one look at my nails on day 6!! Amazing.

Also check out the lovely bracelet I made from our new line: METL by KLIK KLIK. It's made entirely out of sterling silver plated magnets. They're beautiful and also come in 24k gold and black! More deets to come soon...

Thursday, March 24, 2011

Best Manicure. Ever.


As a female, I've had my fair share of spa days and top coats and cuticle trimmings, but just recently I discovered my new favorite obsession: Primp & Polish.


This Williamsburg nail bar, which is a mere 2 blocks away, gives a $12 manicure that lasts 5+ days! I'm embarrassed to say it took me 10 months before I walked in (I literally live around the corner), but now that I know they perform miracles here I have to let the world know... and go in every Monday.


Bajillions of colors to choose from. OPI, Essie, even the complete line of Chanel nail colour.


And the cute girls that worked there loved our KLIK KLIK bracelets. They were talking about them a lot, but it was in Chinese so I'm sure it went something like "Woah these bracelets are radical! I can't believe those are all magnets! Can you believe Kellar's cuticles though? They're a freaking mess." I chose a lovely Easter Egg Lilac color. And Page chose a shimmery Dinosaur inspired green color (to match her bracelet, duh).

Primp & Polish, 189 Grand Street Brooklyn, NY 11211

Monday, March 21, 2011

KLIK KLIK JEWELRY HEX NECKLACE


For this necklace there's no need to take an adventure to the craft store. All you need is one KLIK KLIK JEWELRY kit. It's a great design held together entirely by magnets, and if you get bored with it halfway through the day or halfway through this post, you can change it into any number of other necklaces.


KLIK KLIK small sphere, cube and wand shaped magnets...


Start by pulling out a string of the small sphere magnets. You're going to curl them tightly together to make a flower shape, with the magnet string hanging off the end.


Grab the excess string of magnets and start winding it around the flower shape, a hexagon will start to form as you go along.


Once you have a five sphere edged hexagon (5x5x5x5x5x5) tell yourself 'good job' and set it aside.


Since you did such a fabulous job on making that first hexagon, now make two more, exactly the same way: string of small spheres - flower shape - wind it around - 5x hexagon - done.


When you have three perfect little magnet hexagons, it's now time to mess them up by removing the center flower shape. Using your finger nails, or another magnet, pop out the inner-most 7 small spheres and set your new-and-improved hexagon aside. Repeat with the other two hexagons.


Next make two sections of wand, cube and wand magnets. It should look like a little barbell, but the reverse, with two bars and one bell. Take your first barbell and attach it to the top right corner of one of your hexagons. Take the other end of the barbell and attach it to the top left corner of a different hexagon. If they don't seem to be working like the picture above, you need to take the barbell off and flip it over, so the opposite ends are touching the hexagons. Once you've got this under control, add the last barbell and hexagon to your design.


Using all three shapes, make a pattern of: small sphere, wand, cube, wand. Do this eight more times and then stick them together, keeping the pattern in mind, into two identical chains. It should look exactly like the photo above.


All you need to do now to complete your "hexy" necklace is attach each of the chains to your hexagon/pendant design. Connect the wand side end to the hexagon shapes and then use the small sphere end to link the design together in the back. Done and done. If you ever questioned what jewelry you could possibly pair with plaid and a Williamsburg stoop, now you know. And know how to make it.

(Glasses, Jason Wu, luxeyeoptical. Flannel shirt, Just A Cheap Shirt, stolen from my boyfriend. Jeans, Forever 21. Boots, LLBean. Tank, Target.)

KIY PROJECT# 3: MESSY PEARL NECKLACE


There are tons of really great messy pearl necklaces out there, most of them with a big price tag attached. But there's no reason to go out and buy one when you can just make it with KLIK KLIK magnets at home and pearls from a craft store. So duh, we did just that.

 
You'll need 2' - 2.5' of pearls (depending on how long you want your necklace to be), KLIK KLIK small sphere magnets and KLIK KLIK medium sphere magnets.


Start by making a loop of small sphere magnets around one end of the string of pearls. This is whats going to hold everything together and serve as the clasp of the necklace once its finished. So make sure its nice and secure. Once you've done that, take a chain of small sphere magnets, attach them to the loop you just made and start winding it loosely around the pearls.


Keep adding more small spheres and don't be afraid to be messy. Clumps of magnets here and there will help give the necklace a nice tangled look.


Once you've artfully intertwined your string of pearls and small sphere magnets, make another loop of magnets at the other end of the chain to hold everything in place.


Now do the same thing with the medium sphere magnets. Wind them around the pearls, attach them to the small sphere magnets and create the exact amount of messiness you like. Finally, stick the two ends together and you have your very own custom designed piece of jewelry. Fancy! You can totally take your KLIK KLIK magnets to the Country Club now.

KIY PROJECT# 2: GRAY RIBBON NECKLACE


For our second klik it yourself project we wanted to make something really simple and elegant. This gray silk ribbon was the perfect place to start, even though the gray kind of matches the color of the sky today which makes us sad. But bad weather = great day to stay inside and make jewelry!


All you need to make this stormy weather inspired necklace is 3.5' of ribbon and a KLIK KLIK JEWELRY medium spheres add-on. If you prefer a sunnier colored necklace then by-all-means substitute the gray for a nice spring green or canary yellow.


Start by making a small fold 9" from one end of the ribbon and use two of the medium sphere magnets to hold it together. You'll need to have this extra material on the end so you can tie the necklace in a bow when you are finished. Keep folding over new sections of ribbon and securing them with another magnet. The design should start to look a bit like couture ribbon candy.


Keep folding and magneting. You can mix up the twist and angle of your ribbon folds to give more dimension to your design. Fold and twist and secure with magnets until you reach the 9" mark from the other end of the ribbon.


Finally, complete the necklace by tying a bow in the back. Done! Now you have a brand new super cute necklace that will hopefully have the power to bring the sun back out today. Some people believe magnets to have healing powers, maybe they have nice weather powers too?

Sunday, March 20, 2011

KIY PROJECT #1: PEARL & RIBBON NECKLACE


Today we decided to make a little KIY (klik it yourself) project to see what other jewelry designs we could make using KLIK KLIK magnets. A trip to Michael's was in order, which is a world away in Queens, but once we got there we quickly discovered the plethora of ribbon they had and forgave them for making us drive all the way out there.

This fabulous necklace looks much more expensive than the couple dollars we spent on supplies and is really easy to make. All you need is the small sphere and cube shapes from a KLIK KLIK JEWELRY kit, ribbon and a string of pearls from a craft store. We went with a periwinkle ribbon, but you can use any color you want to match your outfit, or even get kitchy and use some with bunnies on it for Easter!

Start by measuring out three 2' length pieces of ribbon. Once you have those pieces cut, tie a tight knot close to one end and start braiding. We tried taping the ribbon to the table at first, to make it easier to braid, but the tape didn't quite hold so we ended up securing it between our teeth. So get better tape tape than us maybe... Finish the braid off with another tight knot at the other end.
 
Using the small sphere and cube shaped magnets, make a chain of alternating two spheres - one cube - two spheres - one cube and so on. Leave about 20 small spheres to use in the next step.


Next measure out how long you want the pearl strand to be. You'll want it to be about 1.5' so you can wind it around the design and get a nice amount of draping, also leave yourself some extra room to knot off the string holding the pearls together. Once you cut the pearl strand, double tie the string on both ends so the pearls don't slide off, then lay one end of the pearls next to an end of your ribbon braid. Now you're going to secure them together using the extra small sphere magnets. Use 10 of the magnets in a loop to hold the pearls and ribbon together tightly.

 
Once you have the ends together, loosely wrap the pearls and ribbon braid around each other...


..and then secure the other end the same way you did before using a loop of small sphere magnets.


Next, take half of your chain of small sphere and cube shaped magnets and wrap them around the pearls and ribbon. Start at one end, attaching the magnets to the loop of spheres holding together the design, and then loosely wind them around and attach them to the loop of spheres at the other end.

 
Finally, take the remaining small sphere and cube magnet chain and attach it to both ends of the loops holding everything together. Voila! Your own custom-made, incredibly chic necklace all held together with KLIK KLIK magnets.